Saturday, February 26, 2011

Superstition or Serendipity


This is my 13th loan through Kiva and the borrower Nancy's 13th loan too. I have a natural bias to lend to women, 8 women and 5 men to date; which I am working to correct, next loan goes to a man. In this case, whether from superstition or pure serendipity, this is where the money goes.

From Kiva:
"Nancy, aged 40, lives with her three children in her own house in Huancayo, Peru. More than six years ago she opened a food stall in her house and since then she spent every day preparing meals. Her children are grown up and help her in her business; they cook and serve meals.

Thus hard-working Nancy earns a living. She also accepts orders for large quantities when many people come together and celebrate a special event. Her work philosophy is to be always available for her customers, keep order in her business and have adequate control over her accounts. This ensures a stable income and is according to her the key to her profitable business. Therefore she intends to buy new cookware and utensils.

This is her loan No. 13 with Microfinanzas Prisma. Nancy is very happy to rely on continuous financial support, since she always repaid her previous installments on schedule. In addition, she likes being a member of her communal bank, because all her fellow members are responsible and very supportive.

She thanks those who will manage her loan, because it will be very useful to the progress of her activity. She will use the loan to invest in new utensils and plates. She will also invest part of her loan in her farm business and buy a few bags of fertilizer." (translated from Spanish by Kiva)

Y'all come back!

Thursday, February 24, 2011

Chickens

Image copyright Country Threads
Lori and I had a little fun yesterday.

We ordered some new patterns. They are a mixture of pieced and applique, some traditional and some primitive country by Country Threads. See them in the widget thingy in the sidebar.

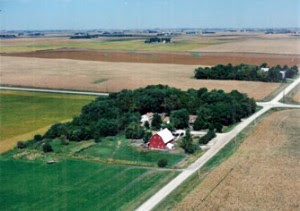
Country Threads is a wonderful quilt shop on a farm in Garner Iowa, famous for both their quilt camps in the big red barn and as the “quilt shop in a chicken coop.” They have had several patterns featured in Country Living (TM) Magazine.

So many projects so little time!

I love chickens. They are fun to watch and we really prefer our own fresh eggs to those available in the stores. They aren't any cheaper but they are certainly way better.

Naturally I bought a bunch of Country Threads chicken themed patterns. This one completed by Kim at Stillmeadow Quilting was particularly appealing, probably because I have some black Australorp hens. I think Deputy Chicken (who is really called Home to Roost) will be moving way out west this year.

Y'all come back!

Sunday, February 20, 2011

I Feel Lucky


And so I should!

I won an autographed copy of Scrap-Basket Sensations by Kim Brackett from a comment on Quilt Times blog. Kim and the very talented quilters who helped test her patterns had a giveaway blog tour. There were hundreds and hundreds of comments but the random number generator picked me, on my late father's birthday. How neat is that?

In addition to being a fabric-aholic I am also a book-aholic and that makes this lucky day even sweeter because this looks to be a super book.

It is rare to find more than one "I have GOT to make this" project in a book. So far from the 18 patterns in the book I found three, and counting because there have been several "Oh that's nice" moments which often inevitably lead to a new project .....

What will be first?

  • Like Sue I am tempted by Island Chain, see it in her header. I have a particularly deep collection of honey through apricot to cocoa batiks at the moment.
  • I was compelled to enter the drawing by Sparkler, at right, I don't know why because I am a bit 'triangled out' right now but it spoke to me, loudly.
  • Flowers for Nana Girl is named after author Kim Brackett's longtime quilting buddy Karen aka Nana Girl (with whom I share a passion for Miss Rosie's quilt patterns) scroll down to see this beauty on her blog, it is probably calling the loudest, and oh goodness, I might have to buy some fabric for it.
Fancy that! Thank you very much Kim Brackett.

Y'all come back!

Saturday, February 19, 2011

Quick, Easy and Inexpensive Design Wall

Lack of a decent design wall can be inhibiting to your quilting ambitions. The sheer cost of the fancy 'made for the purpose' and portable ones is even more depressing.

My quilting buddy Lori didn't have a design wall although she is very blessed in terms of space available for her quilting. On a visit to South Dakota a few years ago I decided to remedy that lack. We do get ourselves into trouble on a regular basis but this was one of the more successful (and completed) projects.

Here is a picture taken shortly after the wall was finished. Click to enlarge. Note the screws with washers at the top edge securing the sheets to the wall. Here is a link to a more recent image.


A visit to your friendly local big box building supply store will yield the materials you need fairly inexpensively. One or more sheets of expanded polystyrene a minimum of 1-1/2" thick should cost you less than $15 each. Because the sheets are a bulky 4' x 8' you will have to consider how you are going to get them home, they are very light so you will want to put something on top to make sure they do not fly out of the back of a pickup. Do NOT ask how I know this.

What kind of board?

Foam sheets come in many types, the two most common are Styrofoam™ sheets and expanded polystyrene sheets. EPS is the generic industry name for a white rigid material made by expanding polystyrene beads with steam and bonding the beads together under pressure in a block or shape mold. This is much less expensive than the trademarked Styrofoam™ product and perfectly satisfactory for this project.

Design considerations

Lori had plenty of available wall space. Because she owns her home and wasn't worried about holes in the panel-board wall we simply screwed the foam to the wall using drywall screws with a washer between the screw head and the foam to make sure we didn't punch clear through. She recycles old blunt sewing machine needles to pin up her blocks.

If you are in a rental or reluctant to make holes you will need to buy the magical 3M Command poster hanging strips which can be removed or replaced without damaging the wall behind. Stick them in a grid pattern to the back of your foam sheet. Six should do the job as it is very lightweight.

We made Lori's design wall with three sheets hung vertically. One sheet hung horizontally with the top edge at a height you can just reach would have worked very well too.

Fancying it up

Expanded polystyrene sheets come in blue and plain white. Ours are white and we left them nekkid. Depending on your budget you can leave it plain as we did or cover it with:
  • all your Works in Progress
  • a pretty thrift store sheet
  • a new cheapo twin flat sheet, or
  • 1-2/3 yards of wide quilt backing fabric
If you are using sheets, remove the hems. You do not want bulk behind your foam sheet, between it and the wall. Fold the fabric neatly to the back and trim off excess from the folds, it is not going anywhere so raveling will not be a problem. You can use thumbtacks to make sure the front stays smooth while you are fiddling with the back. Use short strips of duct tape to secure the fabric to the back of the foam sheet before mounting it on the wall.


Y'all come back!

Friday, February 18, 2011

Progress

My February goals are coming along nicely. I have been playing with some novelty fabric Lori palmed off on me gave me. This is a panel from Jim Shore's Country Kitty line for Red Rooster Fabric, dating about 2005.

I have a couple of Jim Shores Country Kitties figurines, one shown at right which Lori bought me. Her name is Felicity.

The fabric said "kid quilt" and "bright" to me, but with 24 usable 5" x 5-1/4" kitties in the panel it also needed some substantial framing. I decided to use (what I think is) Kaufman Kona 'snow' because I have a lot of it, and to set the kitties just a little wonky. The blocks now finish to 9".

For sashing I found a yard of shocking pink floral fabric, not quite as magenta as it shows in the scan , bottom left. Narrow sashing should get most of it out of the stash, I have had it a long time.

This is classic "What was I thinking?" fabric. I was probably thinking "cheap!" There was a reason it was cheap, I have never found anything that goes with it.

I will set this quilt 4 x 6, with the sashing, a narrow second border and wider outer border I think it will end up about 50" x 70", a good size for a nap quilt for a little girl.

Completed to date: 4 rows

Y'all come back!

Wednesday, February 16, 2011

What is it? UPDATED

I bought myself a present, what is it?


UPDATED 2/20/2011

It is supposed to be a puppy. It is a paper stapler which does not use metal staples. In some magical way it cuts a tab and a slot, then folds and slides the paper through the slot like a stitch. It works very well for up to four sheets as long as it is on a level firm surface.


Y'all come back!

Monday, February 14, 2011

Stars by Magic

I have always wanted to make a Lakota Star style quilt, but all those diamonds!

Stars by Magic a book by Nancy Johnson-Srebro published in 2004 promised to teach me how to do it, without diamonds, and without Y seams, not that I find Y seams are scary but evidently some do and Nancy avoids them..

To be honest I was sceptical, but I love books so I ordered it.

This is a magic book.

There is a lot of waste in the technique but it turns out that Nancy is as anti-waste as you can get and she has all sorts of neat ideas to turn waste into useful things, like wall hangings and quilt backs. Whoda thought of that?

The first seventeen pages are devoted to tips, explanations of the method and how to read the block charts. Block charts? Nancy uses a highly individual cutting chart for each block and what she calls a Quilt Map, a synopsis of all information needed to make the quilt from block size to yardage, all color keyed to the demo quilt. Each block is broken down into step by step colored diagrams.

The first block taught in the book is a Lemoyne Star. I will post a picture of mine when I find where I put my camera. :~( The Block Chart enables you to choose from 15 different sizes, from 4" to 18". There are a total of 30 star variations from strange cactus-y looking ones to lilies and palm trees, and of course the Lakota Star.

This book was a good buy, I recommend it highly; 30 blocks, 10 quilt patterns, a bunch of cool border ideas, what is not to like. If you can make bias binding you can make complex stars using this method.

Y'all come back!

Friday, February 4, 2011

February Goals


Weekly goals are going to become monthly goals because for me, the weekly goals become stressful. It is just the way I am and I am too old and cranky to want to change my ways.

My last goal was to finish the boredom quilt, which has a new name, "Waste Not", to the first border stage. Here it is, currently 51" x 63", it will get bigger with two more borders. One tiny and fiddly the other bigger and blue. You will understand the name when you see it finished, I promise. Click the picture to make huge.

This project is completely out of my normal comfort range. It was kinda sorta fun after I got over the urge to go find my sunglasses every time I sat down to sew. My husband likes it, it is "cheerful".

February goals are
  • to make another row, this time seven blocks plus two pieced setting triangles on my Double-X Effect quilt, this will mark the halfway point on the body piecing.
  • Dig out a UFO, any UFO and finish it.
  • Maybe play with a new stash-busting project, some fabric Lori gave me.


Y'all come back!